Configuring Microsoft Outlook Express using IMAP
This step by step tutorial walks you through configuration of your email account in the Microsoft Outlook Express email client for use with your DNI email account.
-
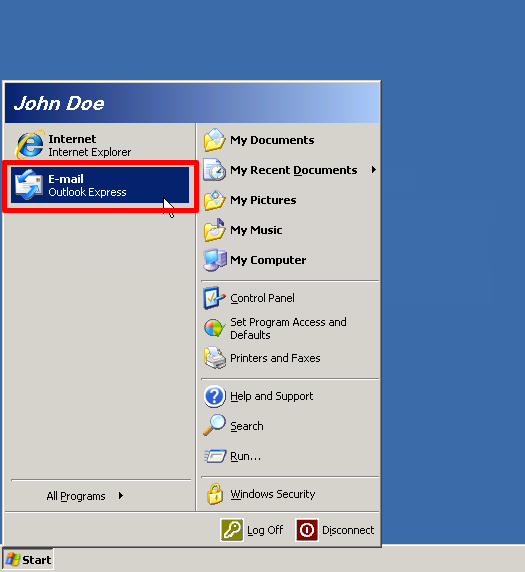
Open Microsoft Outlook Express.

-
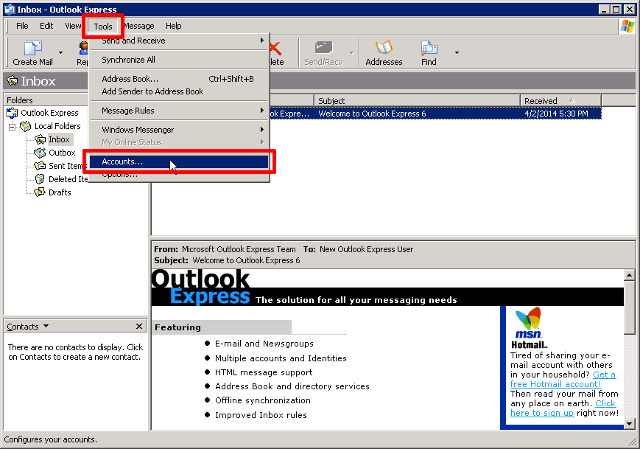
Click "Tools" to view the Tools drop-down menu, then click "Accounts...".
-
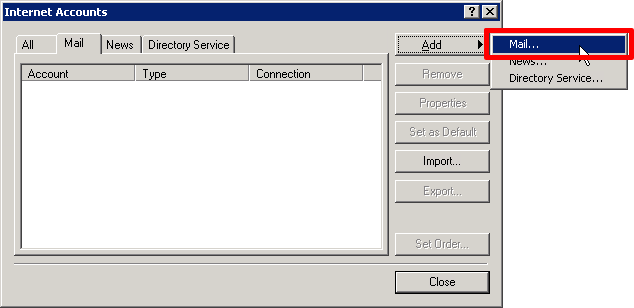
Click "Add" to view the Add drop-down menu, then click "Mail...".
-
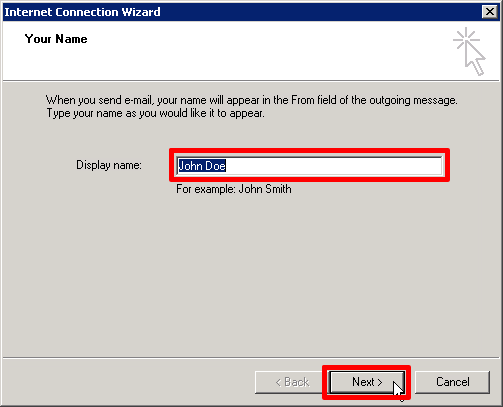
Enter your name as you want it to appear when you send email, then click "Next".
-
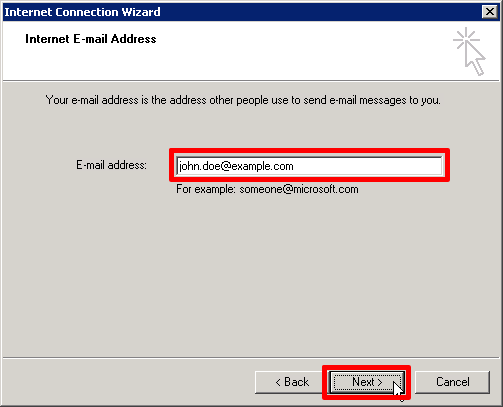
Enter your Datility email address, then click "Next".
-
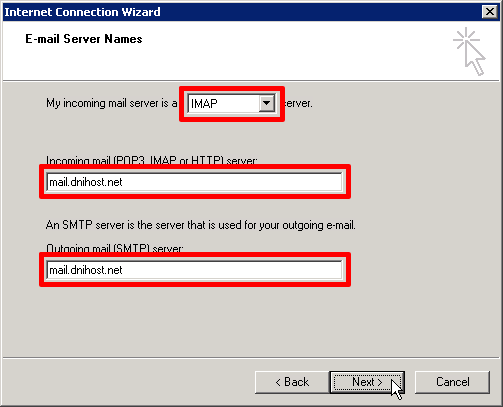
Enter the following settings, then click "Next".
- My incoming mail server is: IMAP
- Incoming mail (IMAP) server: mail.dnihost.net
- Outgoing mail (SMTP) server: mail.dnihost.net
NOTE: The Datility email service supports both IMAP and POP. We recommend that you choose IMAP because it will keep messages in sync between your computer any phones, tablets, or other devices that you use with IMAP to access your email account. The settings that follow are the same for both IMAP and POP, excluding the port numbers provided in step 9.
-
Enter the following settings, then click "Next".
- Account name: Enter your full Datility email address.
- Password: Enter your Datility email password.

-
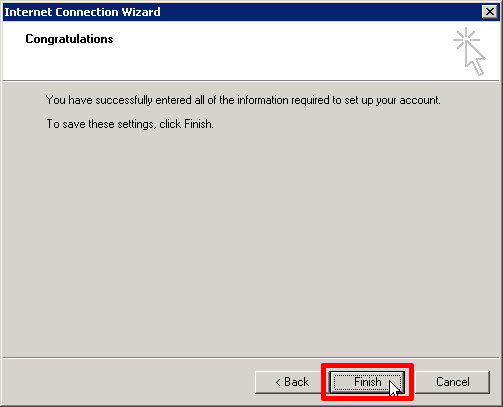
Click "Finish" to continue.
Note: Keep going. We still need to configure a few more settings!
-
Click "Tools" to view the Tools drop-down menu, then click "Accounts...".

-
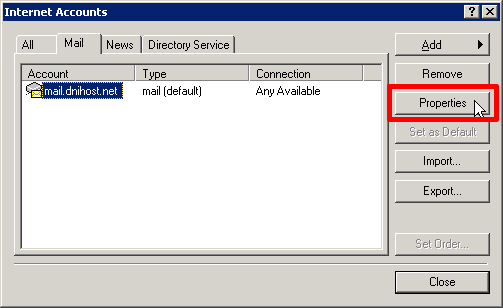
Go to the "Mail" tab on the Internet Accounts window. Highlight your Datility account, then click "Properties" to edit the account settings.
-
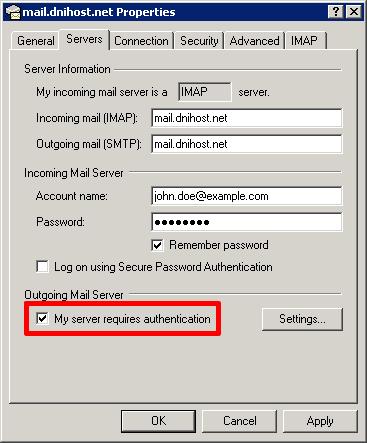
Go to the "Servers" tab on the Properties window. Adjust the following settings.
- Check "My server requires authentication"
-
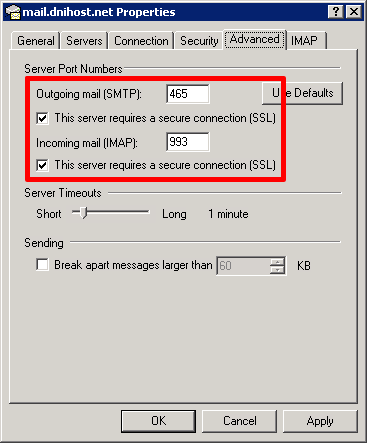
Go to the "Advanced" tab on the Properties window. Adjust the following settings, then click "OK".
- Outgoing mail (SMTP) port: 465
- Check "This server requires a secure connection (SSL)"
- Incoming mail (IMAP) port: 993 (or 995 for POP3)
- Check "This server requires a secure connection (SSL)"
If using POP3, you will also need to adjust these settings:
- Check "Leave a copy of messages on server"
- Check "Remove from server after N days". Set days to 5 or more.
- Check "Remove from server when deleted from Deleted Items"
-
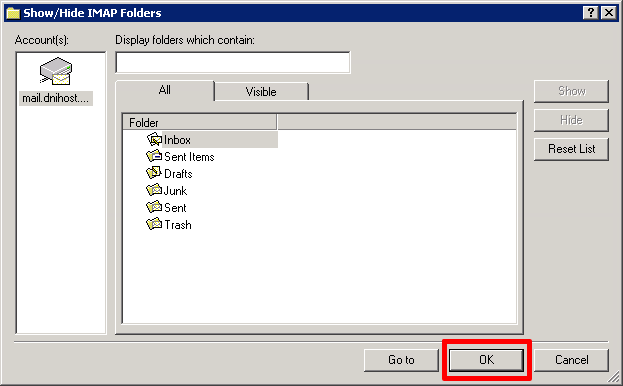
Outlook Express will ask to download a list of IMAP folders. Click Yes.
-
Outlook Express will list your IMAP folders. Click OK.
-
You should see messages in your Inbox. If this is a new mailbox, you will have a welcome message from Datility.
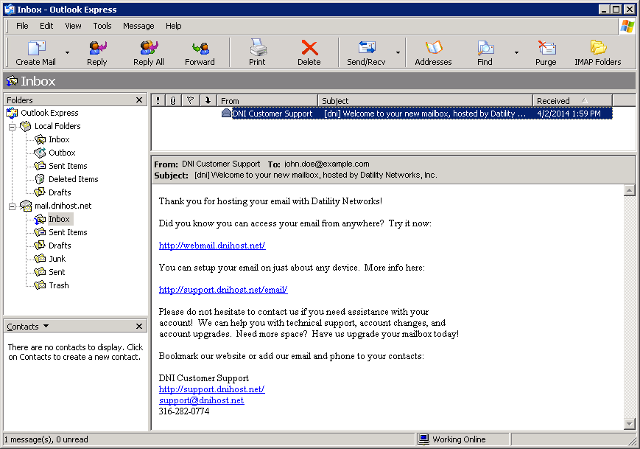
Setup complete! You should now be able send and receive your Datility email in Outlook Express.